
Quick start
This guide takes you from a fresh Stravia Desktop or Server to a completed model request you can see in Request history.
Before you begin
Choose the way you want to run Stravia:
- Desktop is for one person using Stravia on the same computer as the management interface. Download the current desktop installer from GitHub Releases and open it. Desktop uses its native local session; it does not ask you to claim a Server setup token or create a Server administrator password.
- Server binary is for a local or self-hosted instance. For the Windows x86_64 Server archive, the current public release page lists
stravia-server-v0.3.1-windows-x86_64.zip(observed 2026-10-02); choose the current release and matching file for your operating system and architecture. Verify the download againstSHA256SUMSon the same release page . - Server container is another self-hosted option when Docker is already available. The example below publishes only on the local machine. Use a new Docker volume name if you do not intend to reuse existing Server data.
You will also need access to at least one model service and its supported sign-in method or API credential.
Model-service requests may be billed by that service. Do not expose a new Server to a network or the public internet until its management access, TLS, and trusted-origin/reverse-proxy configuration are appropriate for that deployment.
Quick Start
1. Start Stravia and open its management interface
For Desktop, start the application and open the management interface it provides. Its native session handles local sign-in; there is no Server setup-token step.
For a Windows x86_64 Server archive, use PowerShell after downloading and extracting the archive. This example refuses to reuse an existing data directory:
$archive = ".\stravia-server-v0.3.1-windows-x86_64.zip"
Expand-Archive -LiteralPath $archive -DestinationPath ".\stravia-server"
Set-Location ".\stravia-server\stravia-server-v0.3.1-windows-x86_64"
$dataDir = Join-Path $env:USERPROFILE "stravia-quickstart-data"
if (Test-Path $dataDir) { throw "Choose a new, empty data directory and update `$dataDir." }
New-Item -ItemType Directory -Path $dataDir | Out-Null
.\stravia-server.exe --host 127.0.0.1 --port 23471 --data-dir $dataDirThis command binds to loopback and uses a new data directory. If that directory already exists, choose another empty path; do not point a first-run example at data you already use. Keep the Server process running. Open http://127.0.0.1:23471/setup in a browser, enter the one-time token printed by the Server process, test the SQLite connection, and create the Server administrator. Then sign in. The token is for first-time Server setup, not a client API key. Other operating systems and architectures have different release archives and commands; use the matching archive rather than this Windows example.
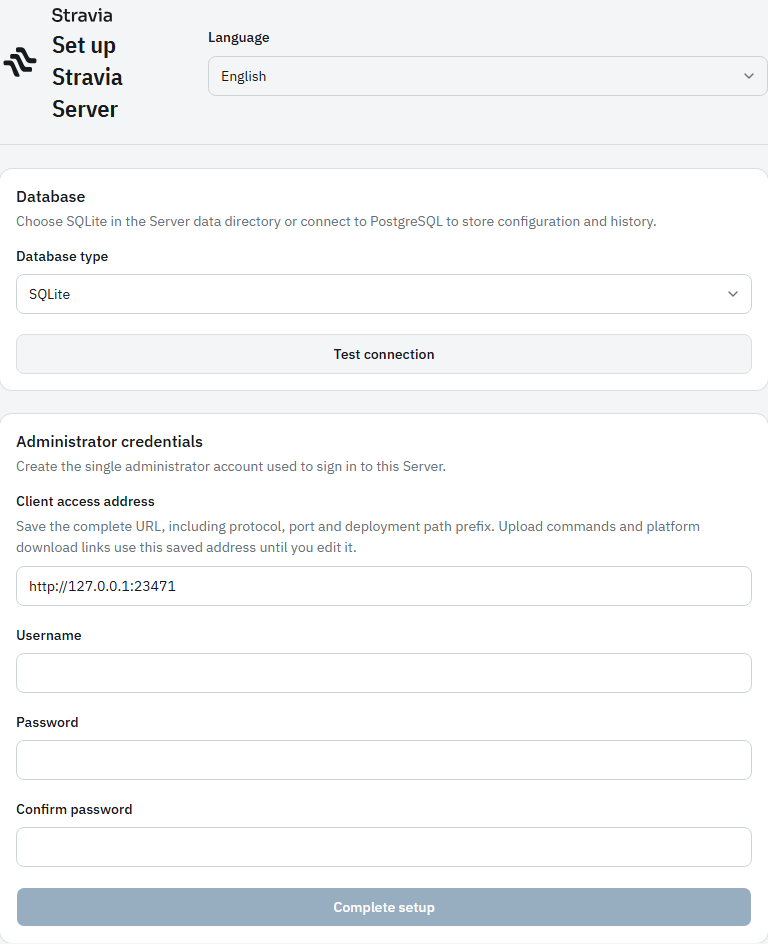
To run the Server container instead, create a new named volume and start the official image:
docker volume create stravia-quickstart-data
docker run --rm \
  --publish 127.0.0.1:23471:23471 \
  --mount source=stravia-quickstart-data,target=/data \
ghcr.io/stravia-ai/straviaplatform:latestKeep the container running, then use the same /setup flow at http://127.0.0.1:23471/setup . The named volume keeps Server data when the container stops. If that volume name already exists and contains data, choose another new name instead.
2. Connect a model service
In Model services, choose Connect service, select the service and sign-in method you use, then enter its endpoint and credential when requested. Save the connection and wait for its model list to sync. Use the credential for that upstream service here—not your Stravia administrator password or the Stravia API key you will create later.
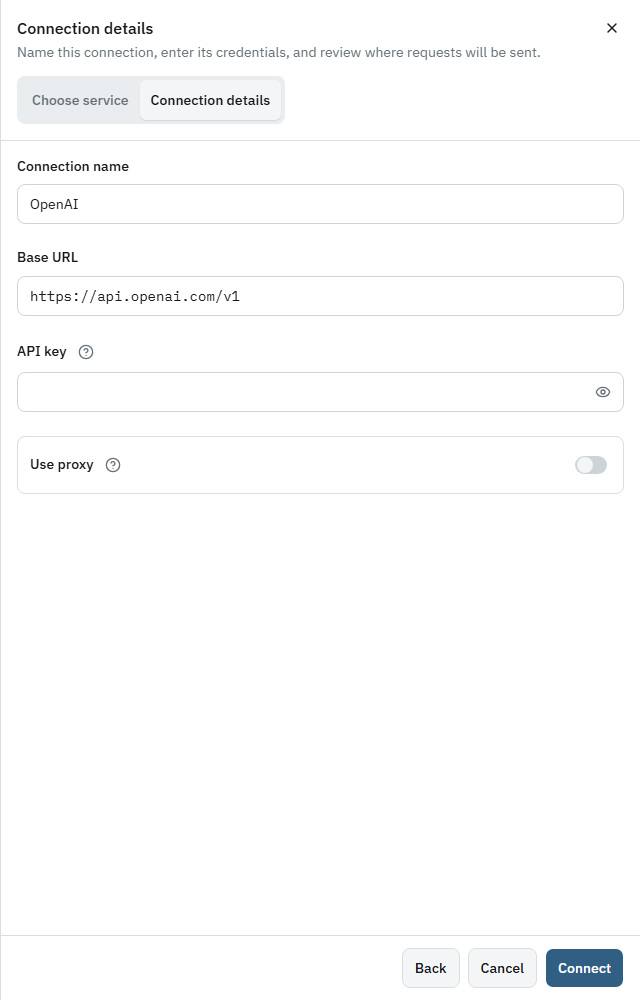
3. Add a model for clients to call
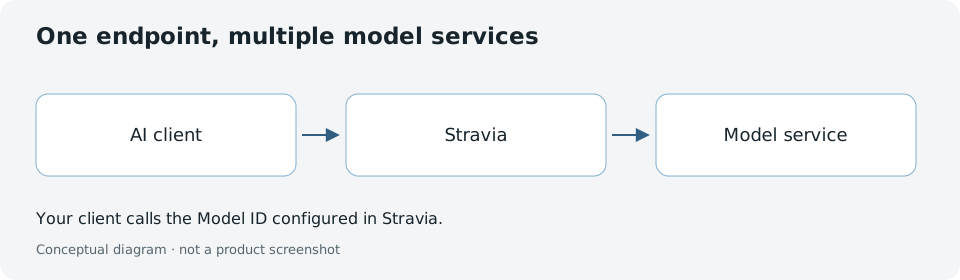
From the synced service model list, click Add model beside the upstream model you want to use. In Models, set the client-facing Model ID (for example, my-model). The route editor preselects the service/model you chose; confirm that destination is enabled, then save. If you create a model directly, choose Add destination, select the model service and its upstream model, leave the destination enabled, then save. Check that the model itself is enabled too. Clients request this Model ID; it can differ from the upstream model ID.

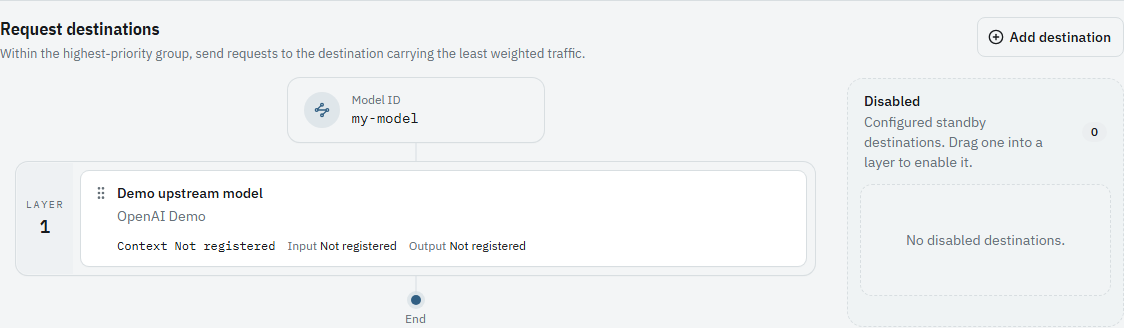
4. Create a client API key
In API Keys, create a key, turn Allow all models off, then open Select allowed models and keep only the Model ID this client needs. Remove any other selected models before saving. Copy the key when Stravia shows it and treat it as a secret. This API key authenticates inference requests. It is not the Server administrator password or an upstream model-service credential.
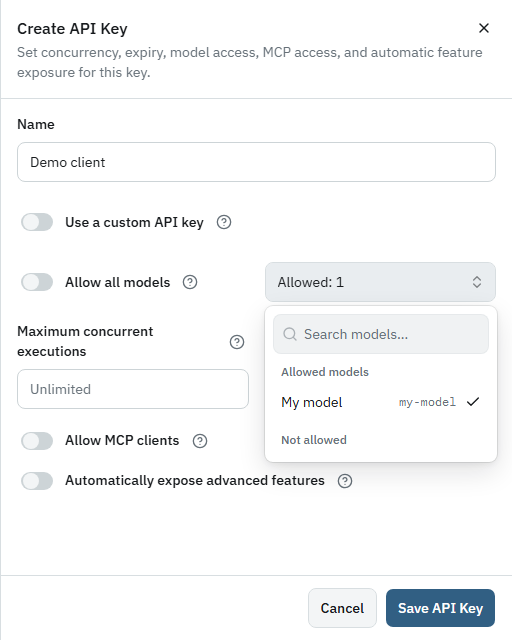
5. Prepare an API example or client configuration
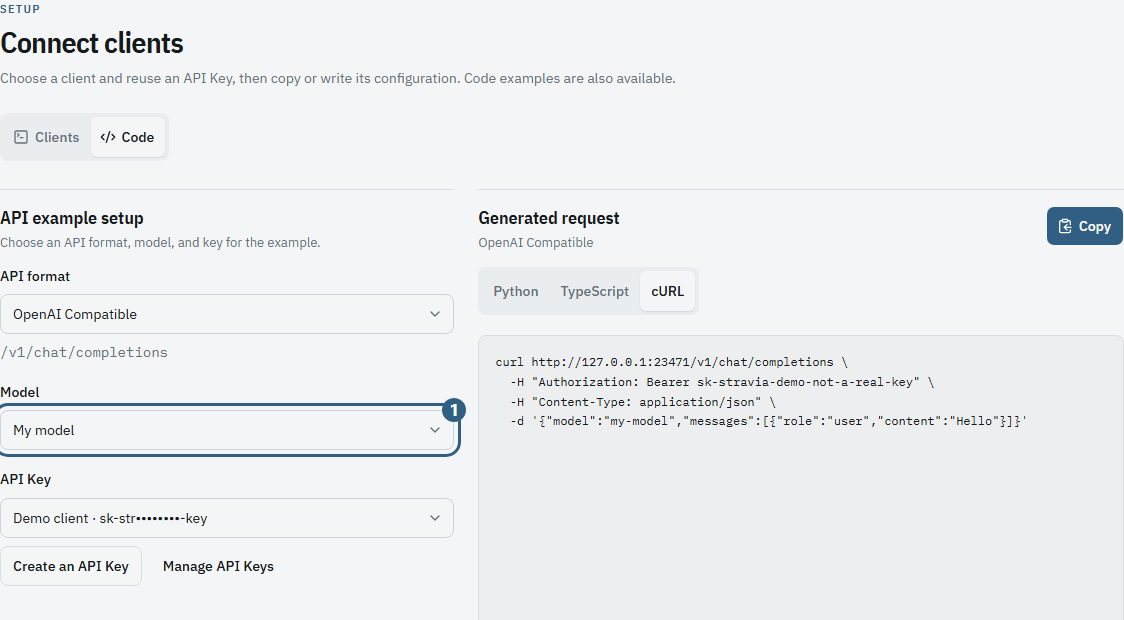
Open Connect clients and choose Code to generate an API example. Select the API format, Model ID, and API key, then review the generated cURL example. If you are setting up a supported client instead, choose Clients, select that client and an API key, and review its configuration. Stravia Desktop also supports writing configuration to supported client files. Copying an example or configuration does not prove that a separate client has connected; this guide verifies the Server API directly in the next step.
6. Send your first request
Run this example in PowerShell on the computer that can reach your Stravia instance. Replace YOUR_STRAVIA_API_KEY with the value copied from the API Keys page and my-model with your saved Model ID. The example sends the prompt to the configured model service, which may incur that service's charges.
$headers = @{ Authorization = "Bearer YOUR_STRAVIA_API_KEY" }
$body = '{"model":"my-model","messages":[{"role":"user","content":"Say hello."}]}'
Invoke-RestMethod -Uri "http://127.0.0.1:23471/v1/chat/completions" -Method Post -Headers $headers -ContentType "application/json" -Body $bodyFor a remote Server, replace the loopback URL with its configured client access URL and use the HTTPS endpoint approved for that deployment. Keep the API key private; do not paste it into logs or public examples.
7. Verify your first request
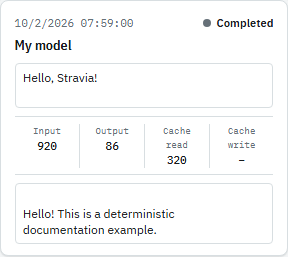
A successful response contains an assistant message under choices. In Request history, refresh the current time range and confirm a completed interaction for the Model ID you called. Open the interaction to inspect its input, output, and reported usage. A dash means a value was not reported or is unavailable; do not treat it as zero or as an exact bill.
If the request fails, check that the model service is enabled and reachable, its credential is accepted by that service, your Model ID has an enabled target, and the API key is active and allowed to use that Model ID. If the Server is remote, also verify its client access URL and network/TLS configuration. Correct the failing setting and send one new request before checking Request history again.
Next steps
- See Connect clients for the existing overview of client configuration previews and Desktop configuration writing.
- Visit the Stravia overview to learn what the platform provides beyond model access.
Troubleshoot a failed first request
If the request fails, confirm Stravia is still running, the client uses its reachable endpoint and supported API format, the exact Model ID is enabled, and the API Key is valid and allowed for that model. Check the model-service connection and then Request history for the recorded error. Change one layer at a time; do not treat a copied example or key as proof of a successful request.